I wrote previously about Continuous Integration for JavaScript where I explained a build with Jenkins and Gradle. I’ve learned a lot since that article and thought it’s now significant enough to write more on the topic.
Documentation
When you’re writing code that other developers have to use or maintain, you ought to provide some amount of documentation. Your code is simply not self-documenting enough.
My favorite doc tool right now is jsduck developed by Sencha Labs for their Ext JS 4 docs. It basically consumes JSDoc-style comments (with some extras for namespaces, etc.) and generates beautiful documentation. Super easy to install and use:
gem install jsduck
jsduck src/js --output target/docs
Use the Gradle wrapper
Using the Gradle wrapper allows users to build your project without installing Gradle, which is beautiful because it removes a very significant dependency for building and running your project.
Here’s how to use it. Add this to your build.gradle file:
task wrapper(type: Wrapper) {
    // version of Gradle you want
    gradleVersion = '1.0-rc-3'
}
Then you just have to run in your shell:
gradle wrapper
and Gradle will add a few files to the project, most importantly gradlew and gradlew.bat (for Windows). These are binaries that your can run in lieu of gradle, and it wraps (obviously) the execution of Gradle such that it will download the correct version of Gradle and execute it locally.
I recommend that you switch to the Gradle wrapper when you have consumers of your project that may not have Gradle. I’m going to be doing this for all of my OSS projects from now on.
Introducing the Gradle Web Suite
Gradle really has building JVM-centric source down (for most languages), but I felt like it was cumbersome to operate on my web files with it. So I’ve written a collection of plugins that focus on making tasks with JavaScript, CSS, and other client-side tech dead simple.
buildscript {
    repositories {
        mavenCentral()
    }
    dependencies {
        classpath 'com.eriwen:gradle-css-plugin:0.4.1'
        classpath 'com.eriwen:gradle-js-plugin:0.4.1'
    }
}

apply plugin: 'css'
apply plugin: 'js'
And now we can use the tasks provided by these plugins:
// Combine, minify and GZip CSS to teenytiny.css
css {
    input = fileTree(dir: "${projectDir}/css", include: ["file1.css", "file2.css"])
    output = file("${buildDir}/teenytiny.css")
}

// Same thing here, and look, file-globs :)
js {
    input = fileTree(dir: "${projectDir}/js", include: "**/*.js")
    output = file("${buildDir}/combinedMinifiedAndGzipped.js")
}

// ... and there's support for other tools like CSS Lint!
csslint {
    inputs.files fileTree(dir: "${projectDir}/css", include: "**/*.css")
    outputs.file file("${buildDir}/csslint.xml")
    options = ["--rules=adjoining-classes,box-model", '--format=lint-xml']
}| Gradle CSS Plugin | Gradle JS Plugin |
JsTestDriver
One tool I hadn’t paid enough attention to until recently was JsTestDriver. The awesome thing about it is that it has adapters for other JS testing frameworks like Jasmine. This is great because I don’t have to convert my tests (mostly) to JsTestDriver’s test API and I get crazy speed and reporting I wouldn’t otherwise get.
In a nutshell, JSTD is a testing tool developed by Google whereby you start as server and then “capture” browsers so that JSTD uploads tests to them, the browser runs tests and then sends back test results. This is awesome because it’s super fast and you can have it run every major browser simultaneously!
Here’s how you can use it. First, we need to download JsTestDriver and the coverage plugin JARs. Then we need a configuration file for JsTestDriver:
server: http://localhost:4224

load:
  - lib/jasmine.js
  - lib/sinon-1.2.0.js
  - lib/jasmine-sinon.js
  - lib/JasmineAdapter.js
  - ../js/main.js

test:
  - spec/*.js

plugin:
  - name: "coverage"
    jar: "lib/plugins/coverage.jar"
    module: "com.google.jstestdriver.coverage.CoverageModule"
    args: useCoberturaFormat

timeout: 30
then we need to start the JSTD server:
java -jar path/to/JsTestDriver.jar --port 4224
Now we want to capture a browser by navigating it to http://localhost:4224/capture. Finally, run our tests with all captured browsers:
java -jar path/to/JsTestDriver.jar --tests all
and you should see something like this:
Chrome: Reset
.................
Total 17 tests (Passed: 17; Fails: 0; Errors: 0) (13.00 ms)
  Chrome 17.0.942.0 Mac OS: Run 17 tests (Passed: 17; Fails: 0; Errors 0) (13.00 ms)
/Users/eric/src/eriwen.com/test/spec/PageSpec.js: 95.789474% covered
/Users/eric/src/eriwen.com/test/lib/jasmine.js: 51.640926% covered
/Users/eric/src/eriwen.com/test/lib/sinon-1.2.0.js: 22.916668% covered
/Users/eric/src/eriwen.com/test/lib/jasmine-sinon.js: 73.333336% covered
/Users/eric/src/eriwen.com/test/lib/JasmineAdapter.js: 64.83517% covered
/Users/eric/src/eriwen.com/js/main.js: 60.15037% covered
And here’s how you can run it with Gradle:
task jstd(type: Exec, dependsOn: 'init', description: 'runs JS tests through JsTestDriver') {
    // Default to MacOS and check for other environments
    def firefoxPath = '/Applications/Firefox.app/Contents/MacOS/firefox'
    if ("uname".execute().text.trim() != 'Darwin') {
        firefoxPath = "which firefox".execute().text
    }

    commandLine = ['/usr/bin/env', 'DISPLAY=:1', 'java', '-jar', "${projectDir}/path/to/JsTestDriver.jar", '--config', "${projectDir}/path/to/jsTestDriver.conf", '--port', '4224', '--browser', firefoxPath, '--tests', 'all', '--testOutput', buildDir]
}
Notice the coverage numbers? JSTD has generated a report in lcov format, but this isn’t very readable to humans.
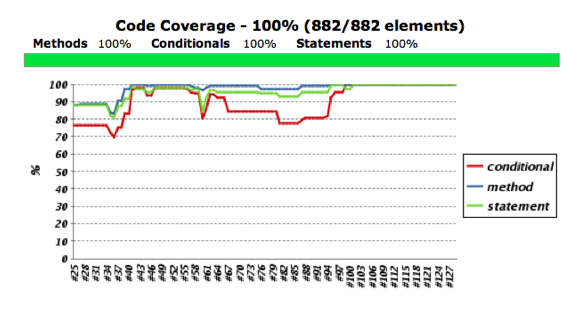
Code Coverage!
I couldn’t find any working scripts on the interwebs to convert the coverage file to Cobertura XML for reporting, so I wrote an lcov-to-cobertura-xml converter so we can report code coverage with Jenkins!
And again with Gradle:
task jsCoverage(type: Exec, dependsOn: 'jstd', description: 'JS code coverage with cobertura') {
    commandLine = ['python', "${projectDir}/path/to/lcov-to-cobertura-xml.py", '-b', "${projectDir}/", '-e', 'test.spec', '-e', 'test.lib', '-o', "${buildDir}/coverage.xml", "${buildDir}/jsTestDriver.conf-coverage.dat"]
}
I talked about all of this at the Rich Web Experience and I have some slides from my talk that might be helpful if you want more detail about this stuff.
What about PhantomJS?
PhantomJS is still very necessary because JsTestDriver does NOT allow page or DOM interaction like Phantom does. I’m really excited about CasperJS as it looks like a really nice way to do more functional testing with Phantom. I recommend you check it out.
Conclusion
You can see all of this in action in the build for this very site.
That’s all I have for now. Let me know your experiences with these things or if there is something I missed, comment it up! Cheers!